Left your headlights on overnight? Or do you suspect that your car battery is running low and may need replacement? If so, you have two options. You can either change the battery yourself or take your car to a mechanic Airport West for a professional check-up. If time is of the essence, however, knowing how to change a car battery can get you out of a sticky situation and back on the road in no time at all.
But what exactly do you need to change a car battery? Contrary to popular belief, not all car battery swapovers require you to use soldering irons for mechanics. These specialised tools can be used to repair damaged electrical wiring in cars – but if your battery and all its cables are intact, then all you need to change your car battery is a jump starter or memory minder, a socket wrench or adjustable wrench, some rubber gloves (for electrical safety), and some pliers, for safely holding bolt heads in place when moving battery terminals and cabling.
Keep on reading for more nifty information on how you can change your car battery safely at home.
Before we jump into our step-by-step guide on how to change your car battery, let’s first outline how you can tell if your battery even needs to be replaced. There are 5 obvious signs that your car battery is either dead, failing, or faulty.
These signs are as follows:
If you’ve observed any of the signs outlined above, then it’s likely that your car battery will need to be changed.
Now that that’s out of the way, here’s our step-by-step guide on how to change your car battery safely.
Below are our 6 steps to changing your car battery:
Step 1- Disconnect your old car battery
Step 2- Remove all screws and fasteners holding your battery in place
Step 3- Inspect and clean your battery tray
Step 4- Install your new car battery
Step 5- Reconnect your battery cables and test-start your vehicle
Step 6- Ethically dispose your old car battery
The first thing you’ll want to do is prepare your car for the battery swapover. This involves parking your vehicle on level ground with the parking brake on and the engine off. Put the gear in first for manual vehicles or in the park for those with an automatic transmission.
Next, if you’re looking to keep all the radio presets or any other presets in your car’s electronic settings, we recommend plugging a memory minder into your cigarette lighter. This will help ensure that all your radio presets are saved and replacing your car battery doesn’t have to feel as unsettling as clearing your browser cache.
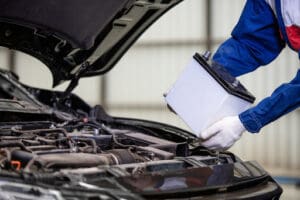
Once everything is in place, pop on some rubber gloves, open up the hood of your car, find your battery tray, and get to work on disconnecting your battery terminals. If your car has a negative ground (negative cable going to the frame of the car), then you’ll want to disconnect the negative terminal first. Your vehicle manual should detail whether your car has a positive or negative ground. If you don’t have your vehicle manual handy, you can either inspect the battery terminals yourself to see which cable is going directly to the frame of your car or simply take your car to your local mechanic for expert assistance.
If you’ve been able to disconnect your old car battery safely, the next step is to remove all screws and fasteners that are holding the depleted battery in place. You’ll need your socket wrenches and pliers here, so be sure to keep them handy, along with a small container or tray for keeping track of all your battery screws.
If for any reason, some of your cables are being caught or tangled in amongst other hardware components, safely remove them using your gloved hands or even by lightly tapping them away with the handle of a socket wrench or other tools like a hammer. Try not to yank or put any pressure when removing the cabling to avoid tears or other kinds of damage. Damaged cables can result in electrical leakage which may deplete your new battery prematurely.
Once your old battery has been removed from your tray, it’s time to inspect the tray bed for any signs of rust, debris, or oil build-ups. Be sure to thoroughly clean your tray bed – again, with gloved hands.
Once large bits of debris have all been removed, clear any smaller pieces of dirt or oil residue with a simple water and baking soda solution. Gentle wipes may also work here.
You should also inspect your battery terminals for any signs of rust or corrosion. We recommend coating your terminals with anti-corrosion terminal grease. Doing so (alongside clearing your battery tray) can help ensure that your new battery has the perfect environment to perform at its best from the get-go.
Now that your battery tray and terminals are all ready for the new battery, it’s finally time to put it in position. Remember that car batteries can be quite heavy, so be sure to enlist a second set of hands if you feel you may require additional support when lifting and positioning the battery correctly.
Make sure that the positive and negative terminals are in the right position before lowering your new car battery safely into the battery tray. Once everything is in the right place, simply go about reinstalling your battery screws and fasteners, and returning everything to where it originally was.
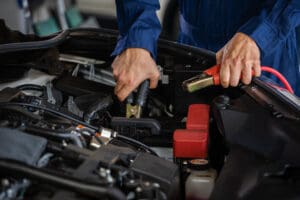
Now, connect your battery cables back in the opposite order that they were removed. In other words, if your car has negative ground and you disconnected the negative terminal first, reconnect your positive terminal at this stage before connecting up your negative terminal again. This will prevent electrical surges due to current imbalances. The last thing you want is to blow out your new battery mere minutes after it’s just been installed.
Once your terminals have been safely reconnected, do a quick double-check to make sure that you haven’t left any tools, loose screws, or other foreign objects in your hood. Then, simply close up your hood, and test-start your vehicle. If your car is turning on, then your battery replacement has been a success! If there are still issues (i.e. sputtering), then there’s a chance your battery may not be connected properly, or there may be another underlying issue that’s causing the problem (but more on this later).
Once the process has all been done and dusted, the final step is to ethically dispose of your old car battery. Remember that your automotive battery is technically considered to be electronic waste, and so it cannot be placed in your curbside bin. Instead, you’ll have to drop your old car battery off at recycling facilities that specialise in responsibly disposing of depleted automotive batteries.
Still unsure? Take a look at this video with visual steps:
If you’re still experiencing performance issues after successfully changing your car battery, there’s a chance that your vehicle may be experiencing other technical problems. Remember that car batteries are supposed to last approximately 5 years, so if your car is consistently experiencing electrical problems, it’s likely not due to a dead or faulty battery.
Combustion engines possess a lot of intricate components and highly complex electrical and mechanical systems. From your fuse box to your oil filter, there are so many potential causes behind the failure of a combustion engine. If you’re truly stumped and can’t seem to identify whether the issue can be attributed to an electrical or mechanical fault, then your best foot forward is to consult your local, trusted mechanics.
With over a decade of industry experience, our team at S.S.C Mechanics will be able to promptly examine and diagnose your vehicle’s electrical or mechanical faults. Our team is equipped to provide a wide range of different services, including support with changing your car battery as well as conducting routine auto servicing, maintenance, and mechanical repairs. Better yet we accept Afterpay and ZipPay!
Want to get your set of wheels back on the road? Then contact the team at S.S.C Mechanics today to schedule your next servicing, maintenance, or auto repair appointment.
If you enjoy this blog, our editor also recommends:
BACK TO BLOGGet In Touch With Us
Fill out this form and one of our friendly team members will get back in touch with you shortly.